Intro to FrameMaker

Note: Sorry, everyone. This blog is very outdated. I no longer use Framemaker for my work, so I have been unable to keep up with the changing versions. Regardless, you may find some of this information useful. I hope that you do.

FrameMaker is a high-end desktop publishing tool that is geared toward professional technical communicators. It is used to create books, technical manuals, and other long documents. For non-technical users, FrameMaker is usually superfluous. Word is cheaper, easier to use, and works great for simple documents. FrameMaker on the other hand, is a powerful tool that can quickly format 1000-page documents, publish in different formats, support various languages, and perform a variety of other complex tasks that are beyond the needs of the home user.

FrameMaker organizes text and graphics in various frames (or pages):
  • Master pages are used to create rules for page layout, ensuring all pages of a similar type also have a similar look. 
  • Reference pages are used to create rules for formatting text and graphics.
  • Body pages contain the bulk of the content. 
This set-up allows the user to edit document factors separately, which decreases the likelihood of introducing errors.

See below or click a link in the contents section to the right of the page for some basic FrameMaker tutorials.


___________
Creating a new document in FrameMaker 9

How do I create a new document in FrameMaker 9?

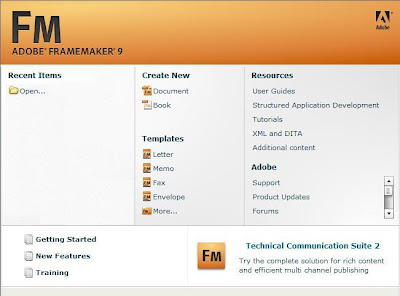
When you start FrameMaker 9, the following dialog box appears:

If you click on Document under Create New, a new dialog box will open, prompting you to choose a template. This dialog box will look like this:

You don't have to choose a template. You can also create a blank page by choosing Portrait, Landscape, or Custom... at the very top of the dialog box.

Click on Portrait to create a new, blank document. When the frame appears, start typing your content.


___________

Master Pages

What are master pages?

Master pages are like the foundation of your page. Master pages tell each page where the page number should go, where the header should go, and where the footer should go. Master pages may also contain reoccurring page elements such as graphics.

A default master page is already present. The name of this default master page is "right." View the "right" master page by clicking on View --> Master Pages.

Your content did not disappear. We are just looking at the bottom layer of your page. Lets add a header.

Add a header to your page by typing in the little frame near the top of the page.


Now lets see how both frames look together. Click on View --> Body Pages to see how your header looks with your content.


How do I add a page number to my master page?
  1. View your master page by clicking View --> Master Pages.
  2. Place the cursor in the header frame. 
  3. Click on Format --> Headers & Footers --> Insert Page #


    Can I create more master pages?

    Yes you can!
    1. When you are in the master page view, click on Special --> Add Master Page... to create a new master page. 
    2. A little dialog box will appear, asking if you would like your master page to look like the current one. Make your selection, name your new master page, and then click on Add
    3. Scroll up and down to see both master pages.
    Each master page can have a different look and may be used for different body pages.


    How do I change which master page is used with a body page?
    1. Go back to the body page view by clicking View --> Body Pages.
    2. Click on Format --> Page Layout --> Master Page Usage... A dialog box will appear.
    3. Choose Custom, and then select your new master page from the drop down list. (Look at the other options as well for future reference.)
    4. Click Add.

    ___________
    To view more tutorials, scroll back up and choose from the contents section at the right-hand side of the screen.

    The Paragraph Designer

    What is the Paragraph Designer?

    The Paragraph Designer helps you format the text content in your body pages. The Paragraph Designer usually sits at the right-hand side of the screen. See the screenshots below for more details on the paragraph designer.

    The following view appears when you click on the first symbol button in the row (the one that looks like a paragraph marker):
    The Paragraph Tag has a list of text styles. I suggest you choose "Heading1" for first level headings, "Heading2" for second level headings, and "body" for your paragraphs. Be sure to hit the Apply button (at the bottom of the paragraph designer) to apply a style to a selected area of text. Look over the other options. They are simple and straightforward.

    You may also create your own style by clicking on Commands: --> New Format.

    If the idea of styles is new to you, here is a great article that explains paragraph styles and why you should use them.

    The following view appears when you click on the A symbol:
    This section is used to modify the font type of your selected text.


    The other buttons on the paragraph designer allow you many other formatting options. Go ahead and experiment with them.


    ___________

    Reference Pages

    What are Reference Pages?

    Reference pages store detailed information about formatting, especially formatting that pertains to automatically generated items such as the table of contents, index, lists, and tables. Each time these items are automatically updated, FrameMaker refers to the reference pages to get formatting information. Reference pages also contain information about HTML conversion.

    To view the reference pages, click View --> Reference Pages.


    ___________

    Creating a FrameMaker Book

    What is a FrameMaker book?

    A FrameMaker book is a collection of FrameMaker files that will be used to create a book, pamphlet, or manual. A FrameMaker book allows you to save each chapter as a separate file, and then link them together in whatever order you want.

    Choosing to create a book is a good idea if you have multiple authors. Each author can edit their own file at the same time. This would be impossible with a single, long document.

    Creating a book is also a good idea if your long document needs a table of contents and an index. When you create these items in you book, they are saved as separate files. This helps to retain formatting. Also, both the table of contents and the index can then be updated in a single click.


    How do I create a FrameMaker book?

    To create a new FrameMaker book, click File --> New --> Book.
    (If you just opened the FrameMaker program, choose New Book under Create New in the dialog box.)

    Check out this screenshot of a FrameMaker Book.
    On the left side you will see the list of files that are included in the book.

    You should also notice that the menu bar changes depending on what area your cursor has selected. If you click on the list of files, the menu bar will look like this:
    If you click on the text area, the menu bar will look like this:
    The first menu bar gives you options to change your overall book, and the second menu bar gives you options to change only that particular file.


    How do I add a file to my FrameMaker book?

    To add a new file to your book, click on the icon as shown in the screenshot below:


    ___________

    Adding a Table of Contents

    How do I add a table of contents?

    You can either create a standalone table of contents that will appear within your document, or you can create a table of contents for a book. I will go over the standalone table of contents first. Scroll down to learn how to create a table of contents for your book.

    How do I add a table of contents that appears inside my document?

    This is also called a standalone table of contents. Follow these steps:

    1. Click on Special --> Table of Contents...
    2. The following dialog box will appear:
    1. Click Yes.
    2. A new dialog box will appear. It will ask which styles you would like to include in your table of contents. (If you have not yet included styles in your document, see the Paragraph Designer page.)
    3. Choose which styles to include in your table of contents by selecting a style and clicking on the arrow to move the style into the "Include Paragraphs Tagged:" list.
    4. Click Set.

    How do I add a table of contents to my book?

    1.  After opening your book file, or creating a new book, highlight the first chapter (or file) in your book.
    2. Click on Add --> Table of Contents
    3. A dialog box will appear. It will ask which styles you would like to include in your table of contents. (If you have not yet included styles in your document, see the Paragraph Designer page.)
    4. Choose which styles to include in your table of contents by selecting a style and clicking on the arrow to move the style into the "Include Paragraphs Tagged:" list.
    5. Click Add.
    6. A new dialog box will appear, and will show more options. The default options are okay for now, so just hit Update.
    7. Your table of contents will appear in your list of chapters (or files). If you would like to move your table of contents to a different position in the list, simply drag and drop it.
    To update your table of contents, simply update your entire book by clicking on the button shown in the screenshot below:


    ___________

    Adding an Index

    How do I add an index?

    To add an index, you must first mark all words and phrases that you would like included in your index. Then, you must decide if you want your index to be a standalone index, or to be a book index.

    Perform these steps to mark index entries:
    1. Highlight a word you would like to be included in your index.
    2. Click on the Marker tab on the right-hand side of the screen. The Marker view looks like this:


    1. Make sure Index is listed as the Marker Type. Any word or phase that is highlighted will automatically appear in the Marker Text box. To add a marker to your word, click New Marker.
    2. The word that you included will now have a visible T attached to the actual text. The following is an example:


    How do I add an index that appears inside my document?
    This is also called a standalone index. Follow these steps:
    1. Click on Special --> Standard Index... (If you are in book view, and Special is not a menu option, click anywhere on the text of your document to make the proper menu bar appear.)
    2. The following dialog box will appear:
    1. Click Yes.
    2. A new dialog box will appear. It will ask which type of marker you would like to include in your index. Index should already appear in the "Include Markers of Type:" list.
    3. Click Set.
    How do I add an index to my book?
    1.  After opening your book file, or creating a new book, highlight the last chapter (or file) in your book.
    2. Click on Add --> Standard Index
    3. A dialog box will appear. It will ask which type of marker you would like to include in your index. Index should already appear in the "Include Markers of Type:" list.
    4. Click Add.
    5. A new dialog box will appear and will show more options. The default options are okay for now, so just hit Update.
    6. Your index will appear in your list of chapters (or files). If you would like to move your index to a different position in the list, simply drag and drop it.
    To update your index, simply update your entire book by clicking on the button shown in the screenshot below:


    ___________

    Formatting the Table of Contents

    How do I format my table of contents?
    1. Open up the TOC.fm file. Click anywhere on the page and then go to View -> Reference Pages.
    2. Scroll to the bottom of the reference page. You will see the following text:
     <$paratext> <$pagenum>
     (You might see more than one instance of this text.
    Repeat the steps for each additional one.)
    1. Replace the space between these two entities with a tab. (Delete the space, and then hit the tab key on your keyboard.) It will now look like this: 
    1. Go to View -> Body Pages. Then click on your first table-of-contents entry. 
    2. In the paragraph designer, click on the paragraph button. Hit the edit button under the list of tab stops. Type in "5.5" (or whatever you want) as your new tab position. Choose your leader. Click continue.
    3. In the paragraph designer, click Update All.
    4. Perform steps 5 and 6 for all additional table-of-contents styles (if you have additional styles).
    5. To make your formatting appear, update your entire book by clicking the button as shown in the screenshot below:


    Similar formatting can be performed for the index by going the index reference page and placing a tab just before this text:

    <$pagenum>

    Then of course you must add a tab while in the body page and apply it to all.

    You can also reformat the index layout so it has two columns by clicking Format -> Page Layout -> Column Layout


    ___________